
How to Shoot Over-Under Photos: Underwater Split Shot Photography Guide
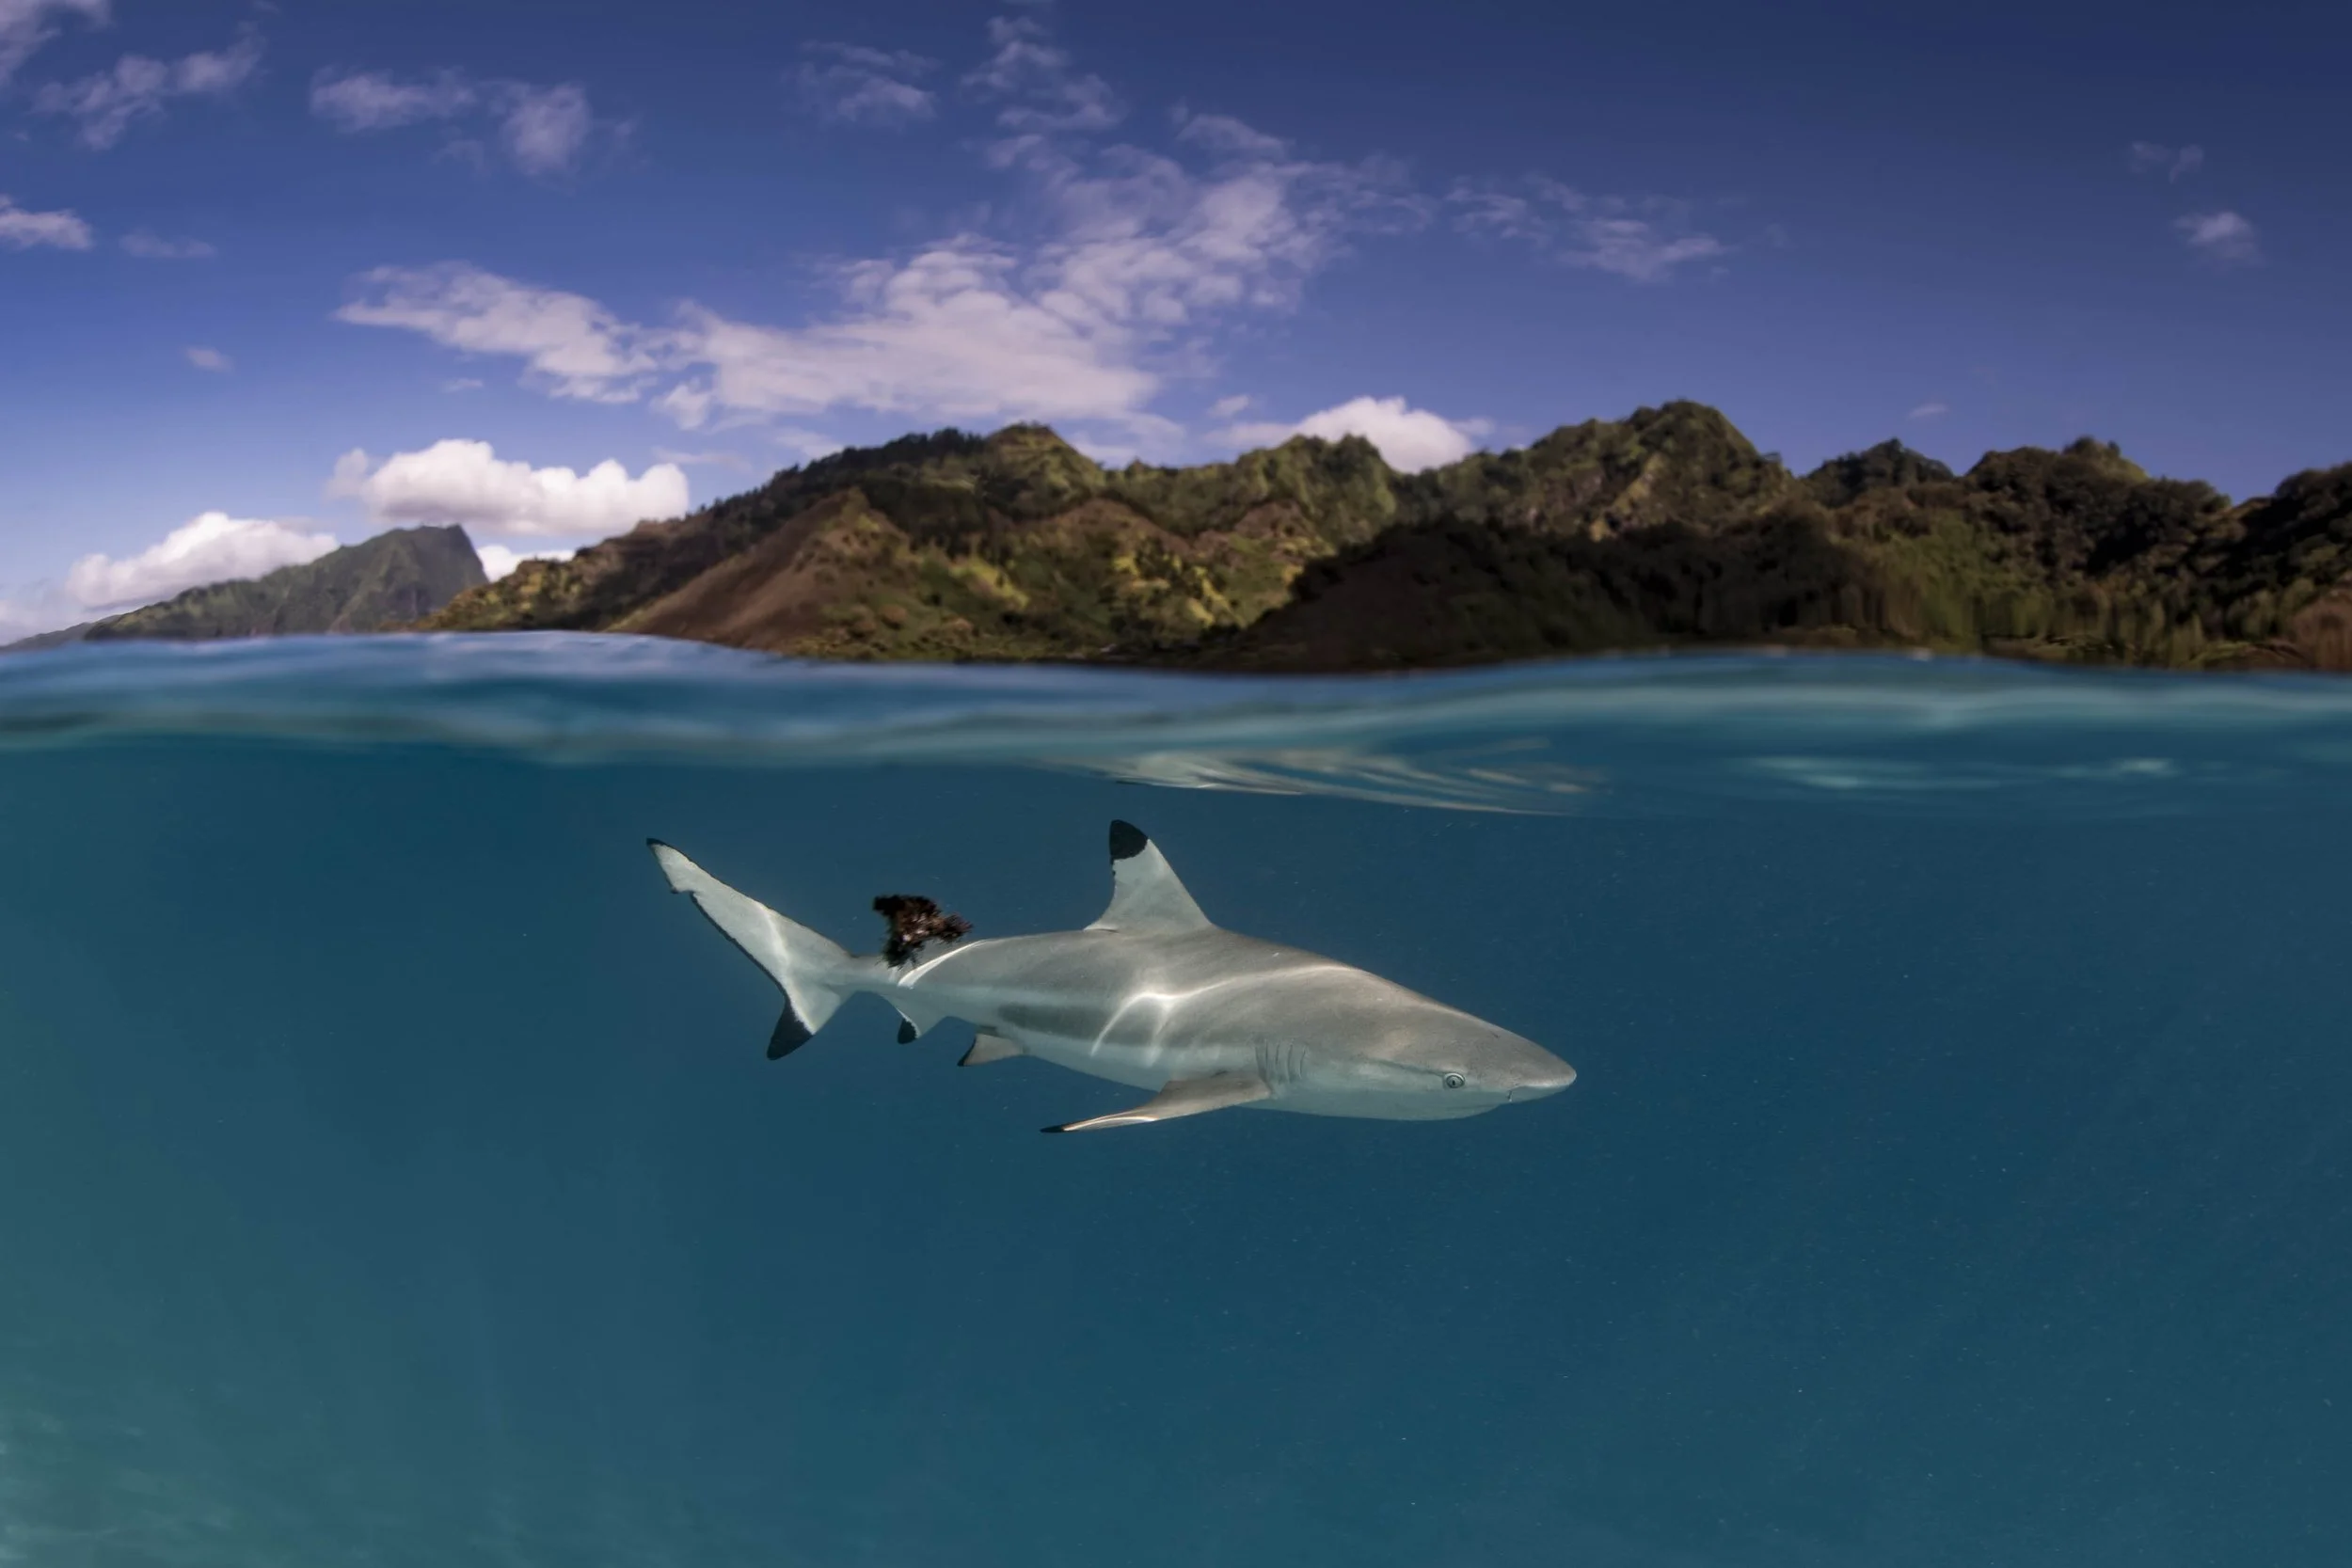
Over–under split shot of a shark cruising beneath the surface, connecting life above and below the waterline.
Over-under photos - also called split shots - are some of the most creative and immersive images you can make underwater.
In a single frame, you get two worlds: the life below the surface and the story unfolding above.
But, they’re also surprisingly technical, and a lot of work has to be put into these type of photos to make them look the part.
Between focusing issues, droplets on the dome, waves, exposure challenges, and composition, most first attempts feel frustrating.
In this guide, I’ll walk through what actually works in the field - from gear and setup, to shooting techniques, to post-processing - so you can start creating clean, balanced split shots with intention.
What Is Over-Under Photography?
Over-under photography is when the lens captures both:
Everything above the water line
Everything below the water line
…in the same exposure. Hence, ‘over-under’.
You’ll often see split shots used to show:
coral reefs meeting tropical islands
turtles surfacing for air
interactions between humans and the sea
Done well, these images are more than just a standout for social media.
They tell a bigger environmental story - showing how ecosystems connect.
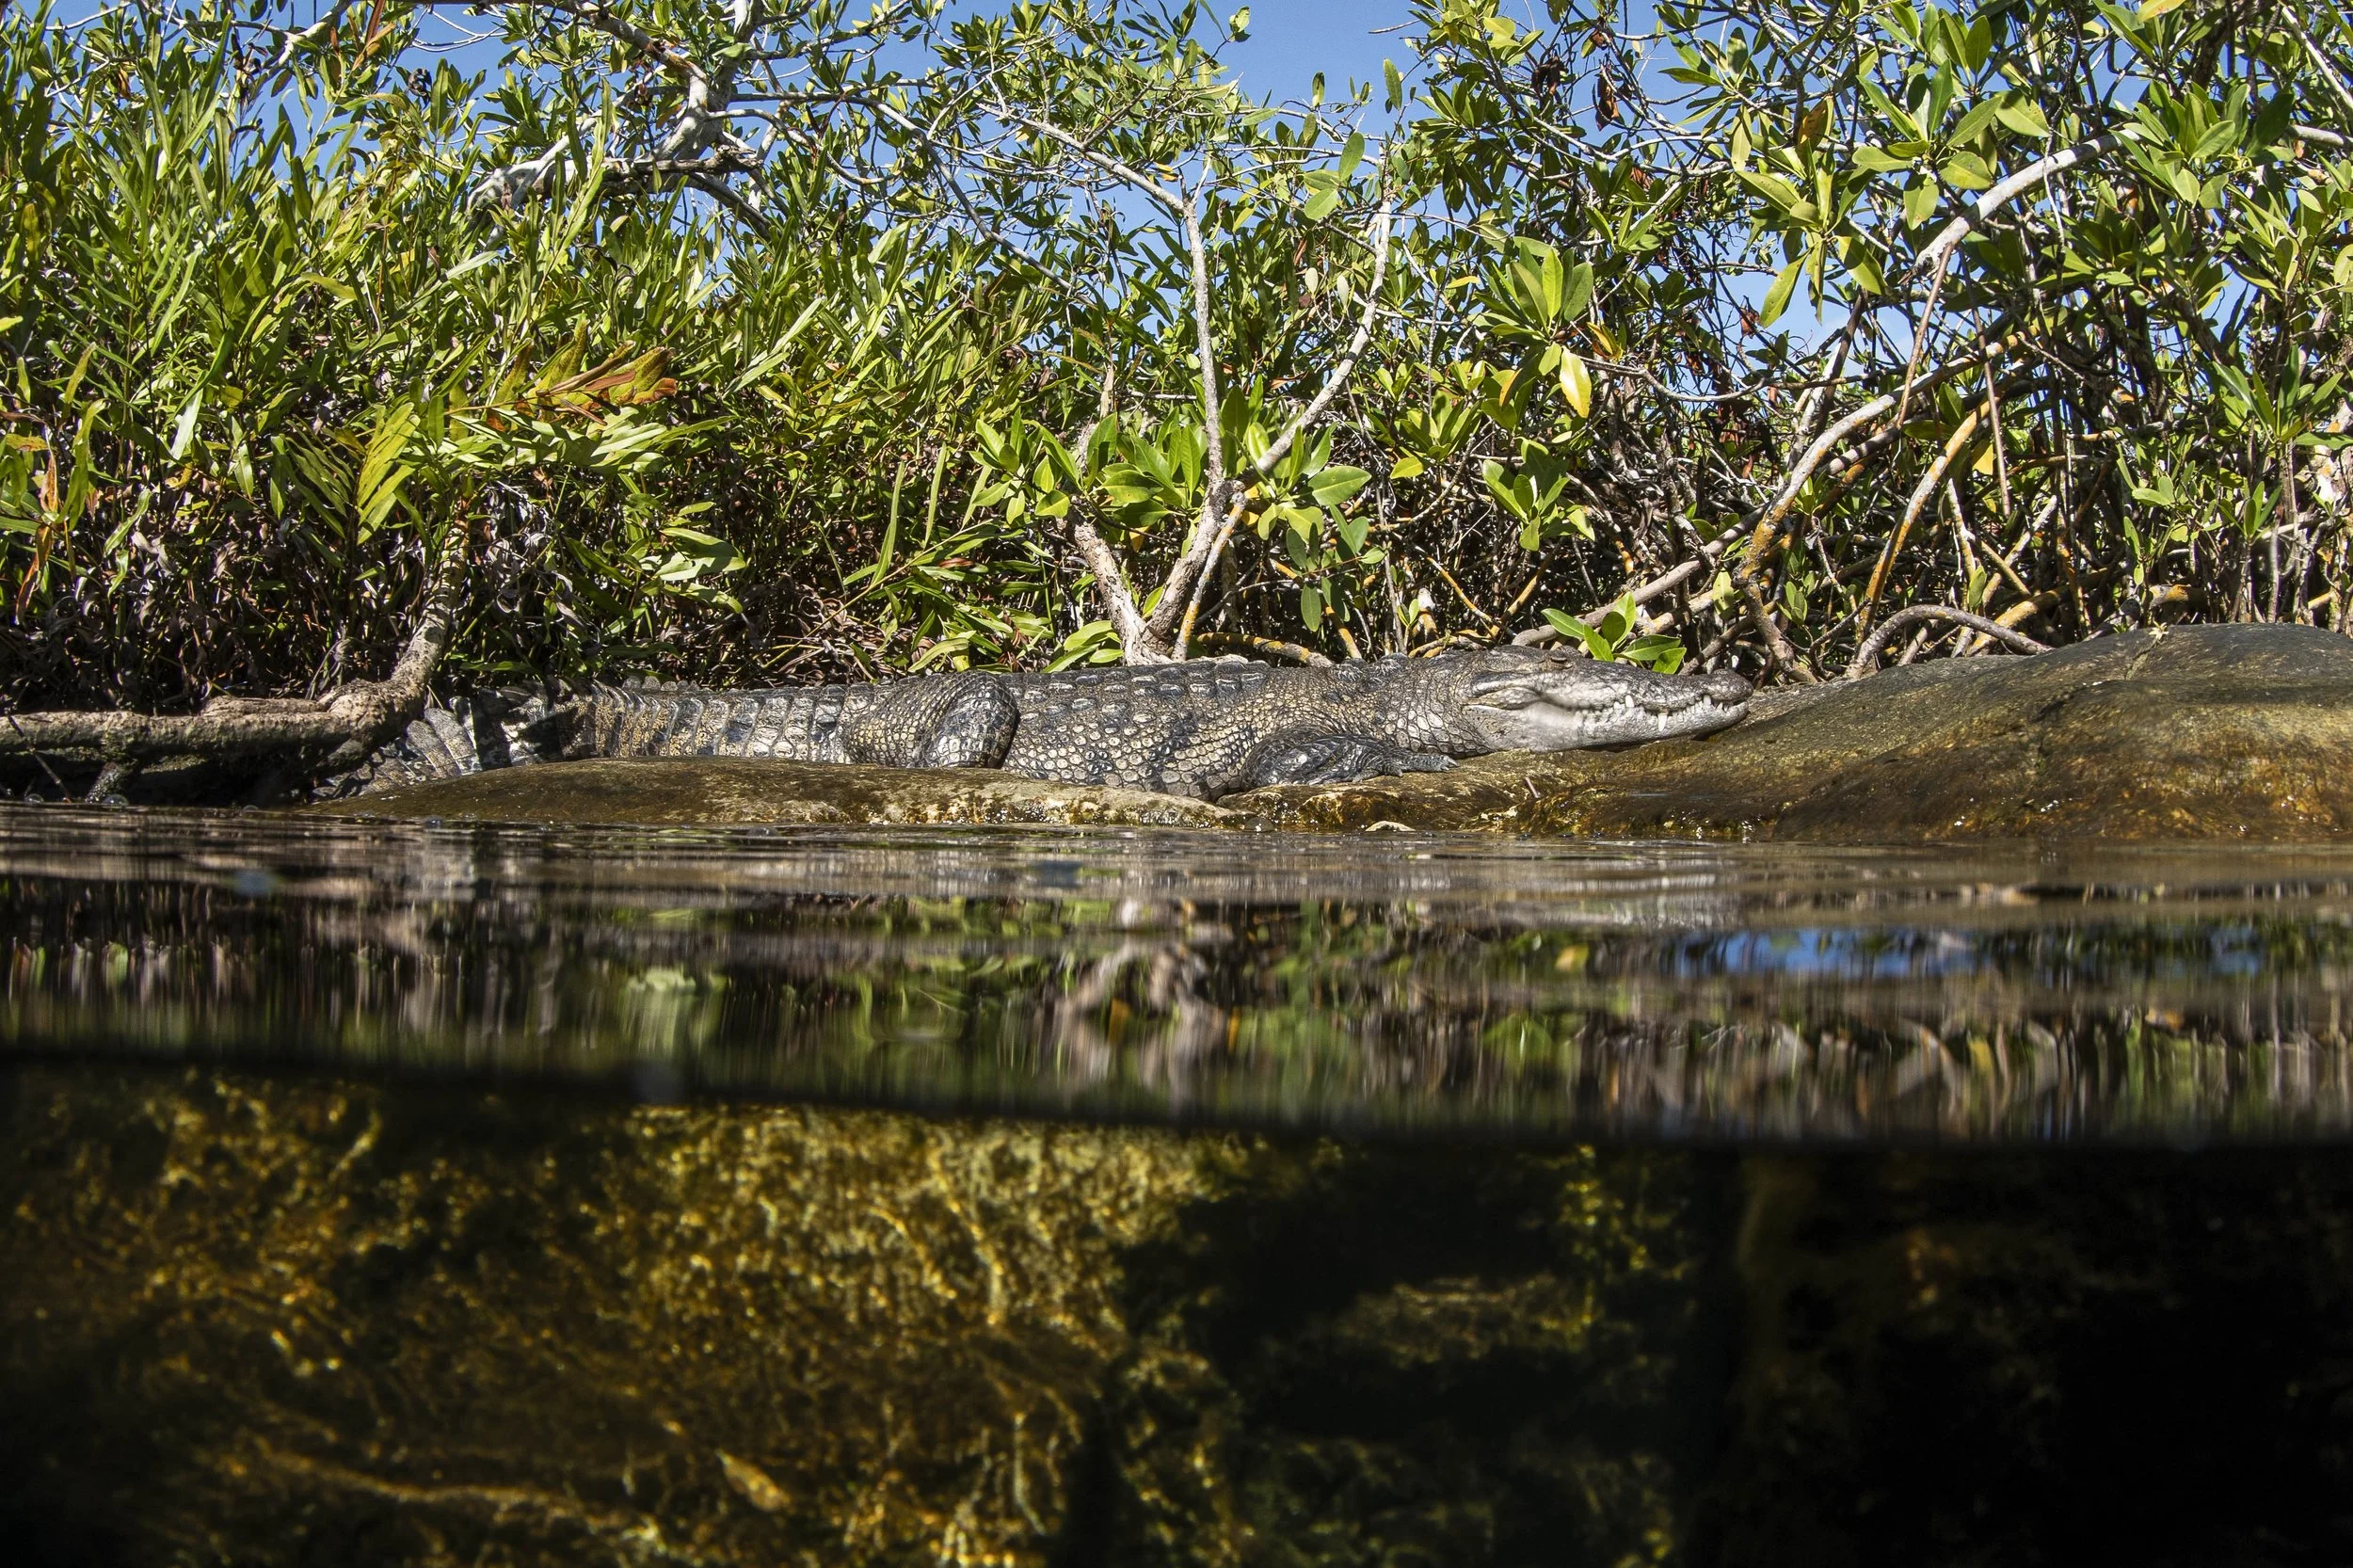
Over–under split shot of a Morelet’s crocodile resting at the edge of a mangrove-lined cenote, linking the forest above with the limestone world below.
Gear for Over-Under Photography: Dome Ports & Lenses
If there’s one thing that matters most in split shots, it’s the dome port. The dome port is a ‘dome-shaped’ lens housing used on underwater camera housings.
Choose a larger dome
If I had to give one tip with dome ports, it would be to use a larger dome wherever you can.
Aim for at least 8 inches or larger to give a smooth, clean waterline. It will also help to keep distortion down underwater and improve corner sharpness.
Smaller domes can work, but you’ll be fighting the water line constantly.
Best lenses for split shots
Similarly to choosing a larger dome, I also recommend choosing a larger, wide-angle lens:
fisheye lenses (8–15mm)
wide-angle zooms (14–24mm, 16–35mm)
This will allow you to get closer, while improving s color, clarity, and sharpness underwater.
Follow this rule of thumb and everything will be much easier: big dome + wide lens = clean splits and happier editing.
Camera Settings for Over-Under Photography
Think of split shots as photographing a landscape and an underwater scene at the same time.
A good starting point:
Mode: Manual
Small Aperture: f/8–f/13 (depth front to back)
Shutter: 1/250 or faster
ISO: as low as possible
Drive mode: continuous burst
Focus: AF-C or AF-S + back-button focus
Metering: matrix/evaluative
File format: always RAW
If you’re using strobes
stay within sync (often 1/160–1/200)
strobes expose the underwater side
ambient light exposes the topside
If using natural light
expose for the highlights above water
recover underwater shadows later
Blown skies are gone forever - shadows underwater usually aren’t.
Planning Your Split Shot
A great split shot doesn’t just happen by chance.
In the majority of cases, it requires careful planning and being in the right place at the right time. Here are some tips for making this more likely.
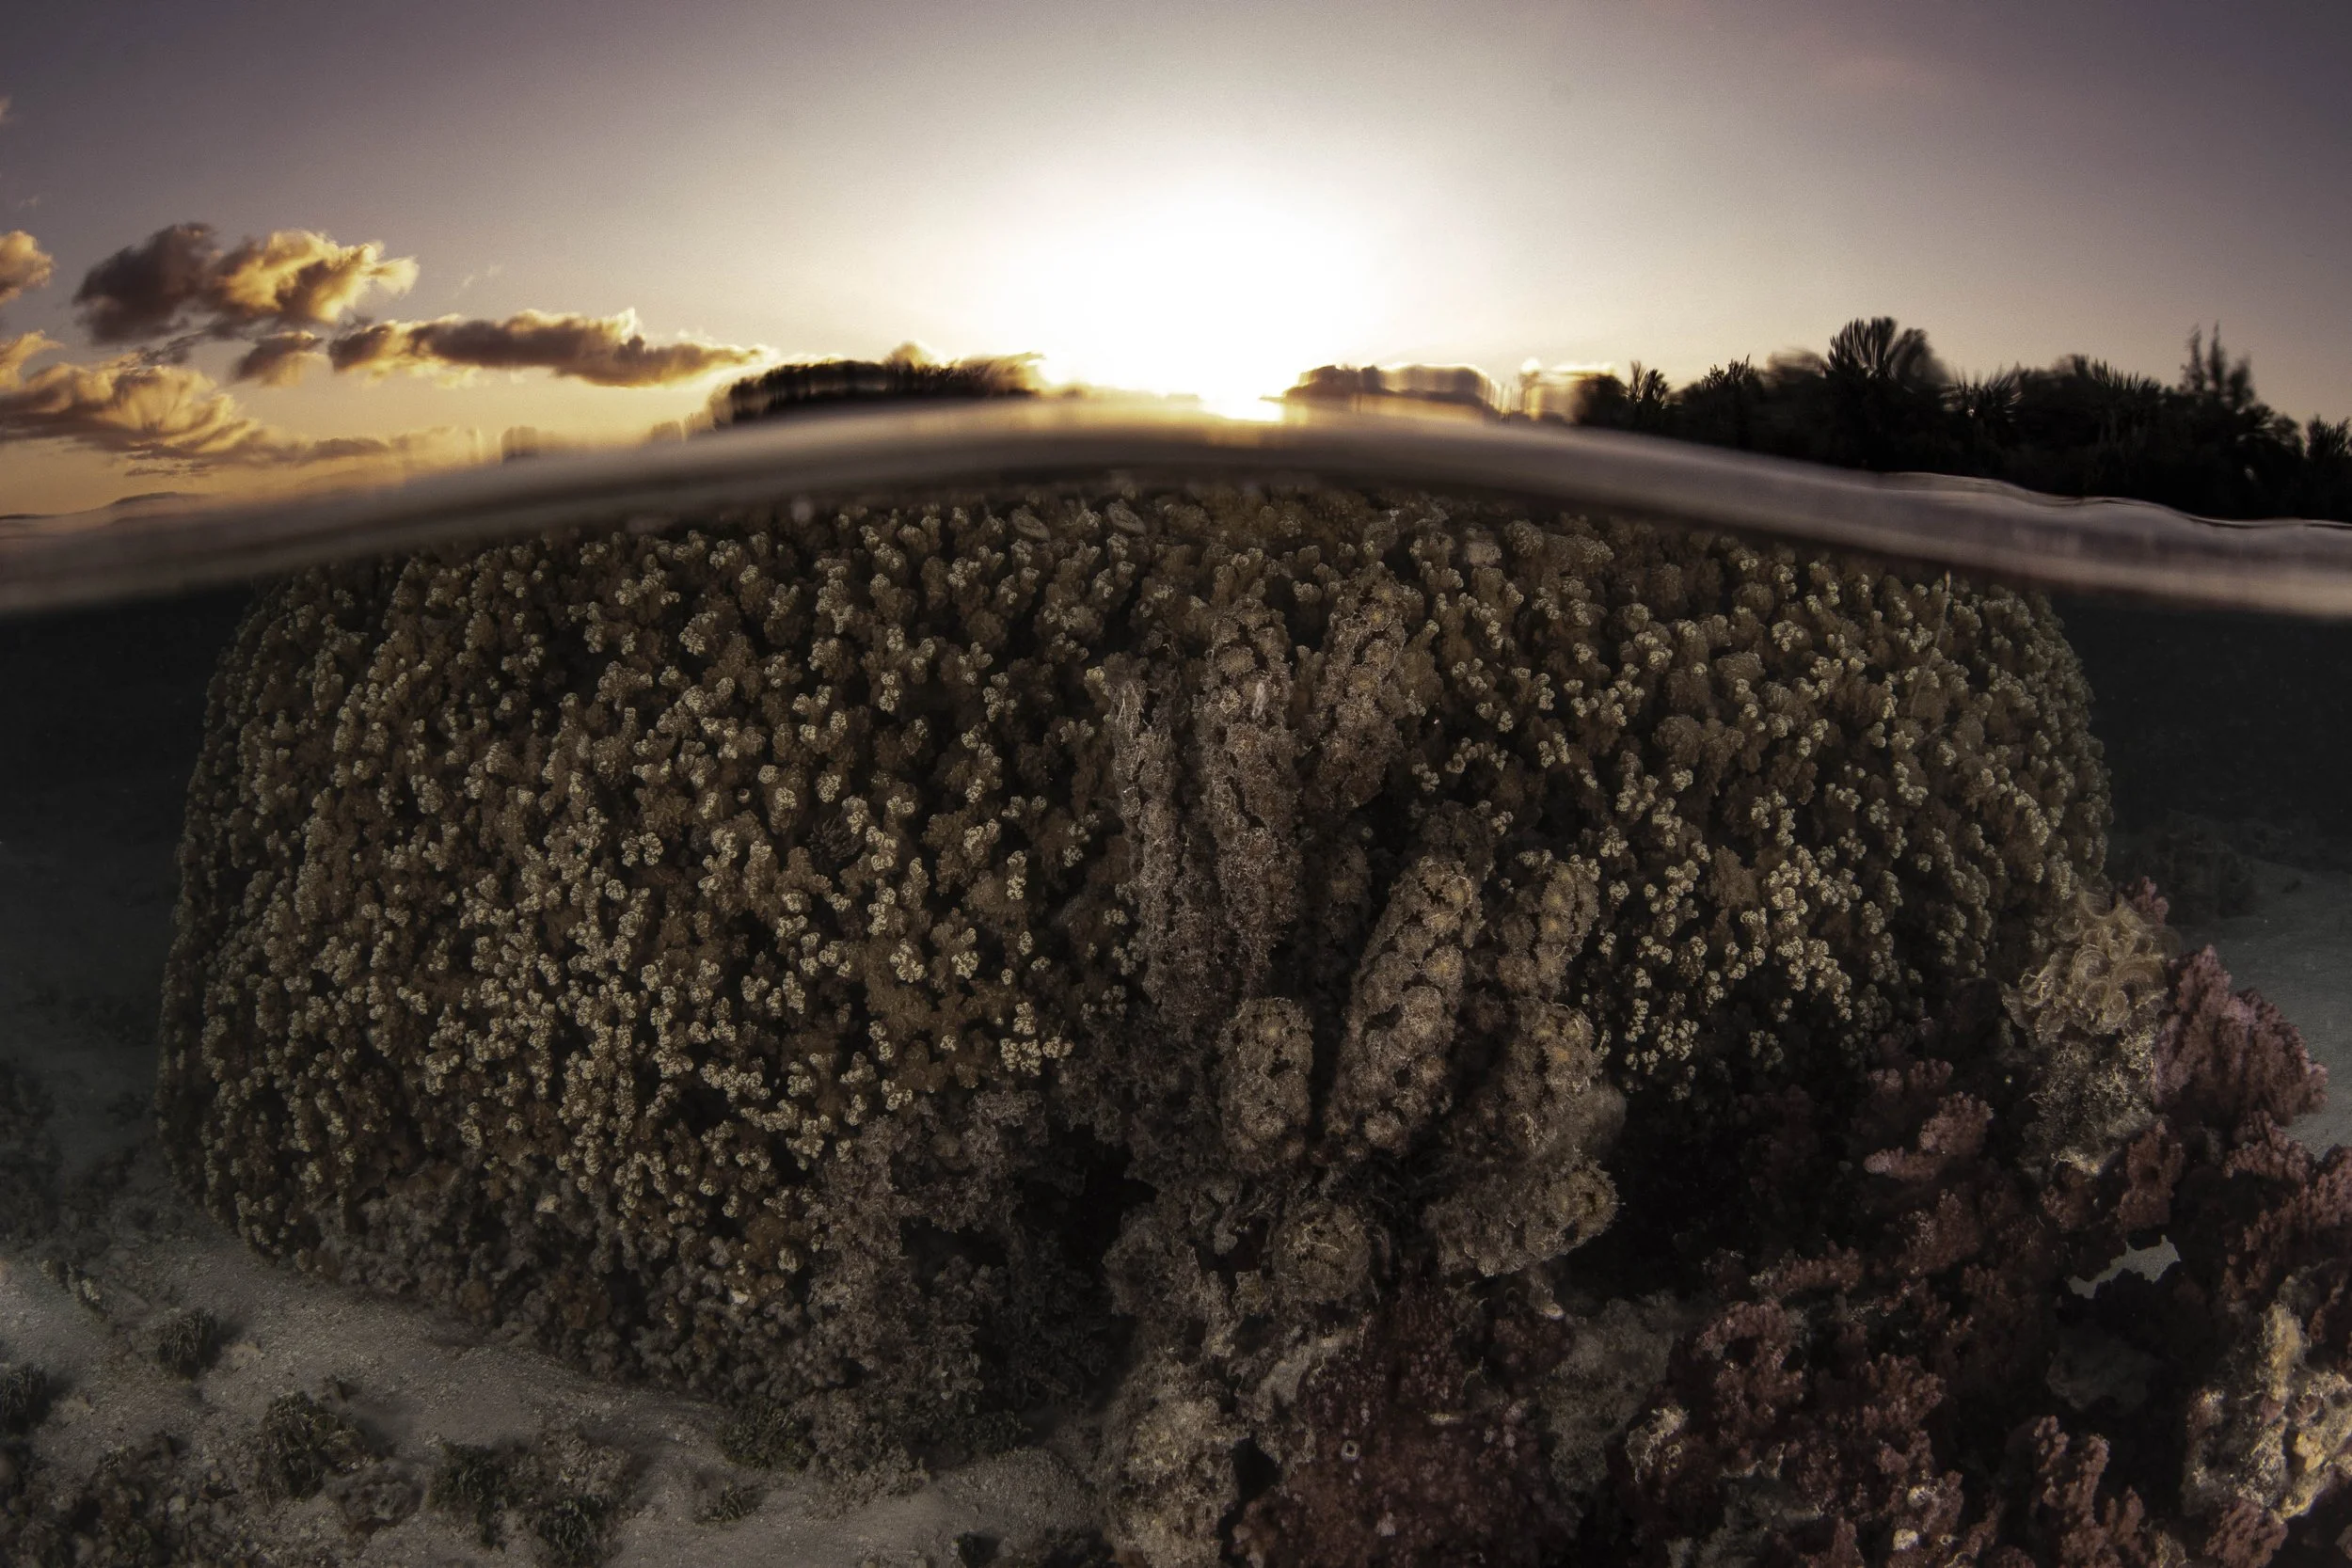
A coral head at sunset makes an ideal subject for practicing split shots, with a stable foreground underwater and soft, balanced light above the surface.
Pick the right conditions
Choosing the right conditions will make life easier.
Always opt for calmer, clear water where possible. Shallow areas are typically a lot better to work with, and avoid surge/strong chop where possible.
Light matters
Lighting is unsurprisingly crucial with split shots.
Sunrise and sunset are my personal favorite times to go for split shots, as the lighting is softer and flattering.
If you’re struggling with underwater brightness, midday can work.
Compose intentionally
My last tip for planning a split shot is to give both worlds meaning.
Split shots are designed to show contrast, so lean into that and tell a story rather than taking a picture for likes.
Get as close as you can to wildlife without disturbing anything, and always be aware of your surroundings.
Managing Water Droplets on the Dome
Droplets are the arch nemesis to split shots, and can easily ruin what would otherwise be an incredible image.
Avoiding the Dreaded Water Droplet Issue
The ‘spit method’ is a no-frills way of fighting back against water droplets. Rub saliva lightly across the dome, rinse, shoot. Cheap, fast, and surprisingly effective.
Other options include using diluted baby shampoo, commercial wetting agents, or simply dunking the dome between shots.
Whatever you do, avoid oily sunscreens and touching the dome constantly - both leave residue and mess up the shot.
Why Back-Button Focus Helps (And How To Use It)
Over-under photos confuse autofocus.
Waves roll through the frame, droplets slide across the dome, and your camera constantly tries to refocus - usually on the wrong thing.
That’s why I almost always use back-button focus.
Instead of focusing with the shutter button, you move focus control to a dedicated button on the back of the camera (usually labeled AF-ON). The shutter button then does only one job: take the picture.
This gives you full control over when the camera focuses - and when it doesn’t.
What Back-Button Focus Actually Does
Usually, when you half-press the shutter, it focuses the camera. You can then full-press to take the actual photo.
With back-button focus, you press AF -ON to focus the camera, and then press the shutter to take the image without refocusing.
So once you get focus where you want it, it stays there - even if waves or droplets move across the frame.
Why It’s Perfect for Split Shots
Back-button focus is perfect for split shows because it allows you to eliminate the possibility of a wave or droplet coming into frame and ruining the focus.
For most over-under scenes, you want focus locked on the underwater subject or a mid-distance area that keeps both halves sharp.
Using back-button focus is as simple as the following steps:
Point at your subject
Press AF-ON to focus
Release your thumb
Shoot as many frames as you want - focus stays locked
Now, when the perfect waterline passes, the image is already sharp.


How to Set Up Back-Button Focus
With most cameras, the steps will be the same.
All you need to do is open your custom buttons/control menu, and then turn ‘shutter half press AF’ off. After that, assign ‘AF-ON’ to Focus.
The goal here is to turn the focus off from the shutter and assign AF-ON to focus instead.
How I Use It Underwater
Here’s a run-through of my real-world workflow when shooting splits.
1. Decide what needs to be sharp
The first step is to decide what needs to be sharp.
A lot of the time, this is the underwater subject - slightly closer than mid-distance.
2. Focus once
The next step is focus.
Here, I will point at the sub and press AF-On (set up as mentioned before). If the subject moves slightly, I'll hold the button. If it is still, then I’ll simply tap and release to get the shot.
3. Compose and shoot bursts
After that, it’s time to shoot some sequences as the waves move. I usually take my thumb off the AF-ON button and shoot sequences with the wave movement.
Focus won’t jump to droplets, waves, or reflections.
4. Refocus only when needed
The secret to shooting these shots is to only refocus when needed.
This means only when you change the subject, or if you decide to change the distance.
If this happens, simply press AF-ON again, refocus, and continue shooting.
AF-S vs AF-C for Split Shots
AF-S (autofocus single) and AF-C (autofocus continuous) can both work for split shots.
Again, it really depends on the scene and what your goal is - here’s a quick comparison of the two in terms of what they are best used for in split shots.
AF-S (Single)
AF-S is best for reefs, rocks, mangroves, and anchored boats.
It allows you to focus once, lock, and then shoot freely, which works well for stationary targets.
AF-C (Continuous)
AF-C is best for moving targets, like turtles, sharks, and even snorkelers.
You should still control this with AF-ON, but the results should be great with this mode.
Tips for Making BBF Feel Natural
Here are some quick tips for making back-button focus (BBF) feel natural:
Practice OUT of water first - this will make your life much easier.
Use a single AF point - it’s more predictable.
Commit to the process, even if it doesn’t feel comfortable at first. Over time, it will become easier.
Once it becomes muscle memory, you’ll forget about the time spent learning it.
Post-Processing Split Shots
Editing is the magic part of the process that can really bring a split-shot to life (or completely ruin it).
To get this process right, here are my top tips that I have found have the most success:
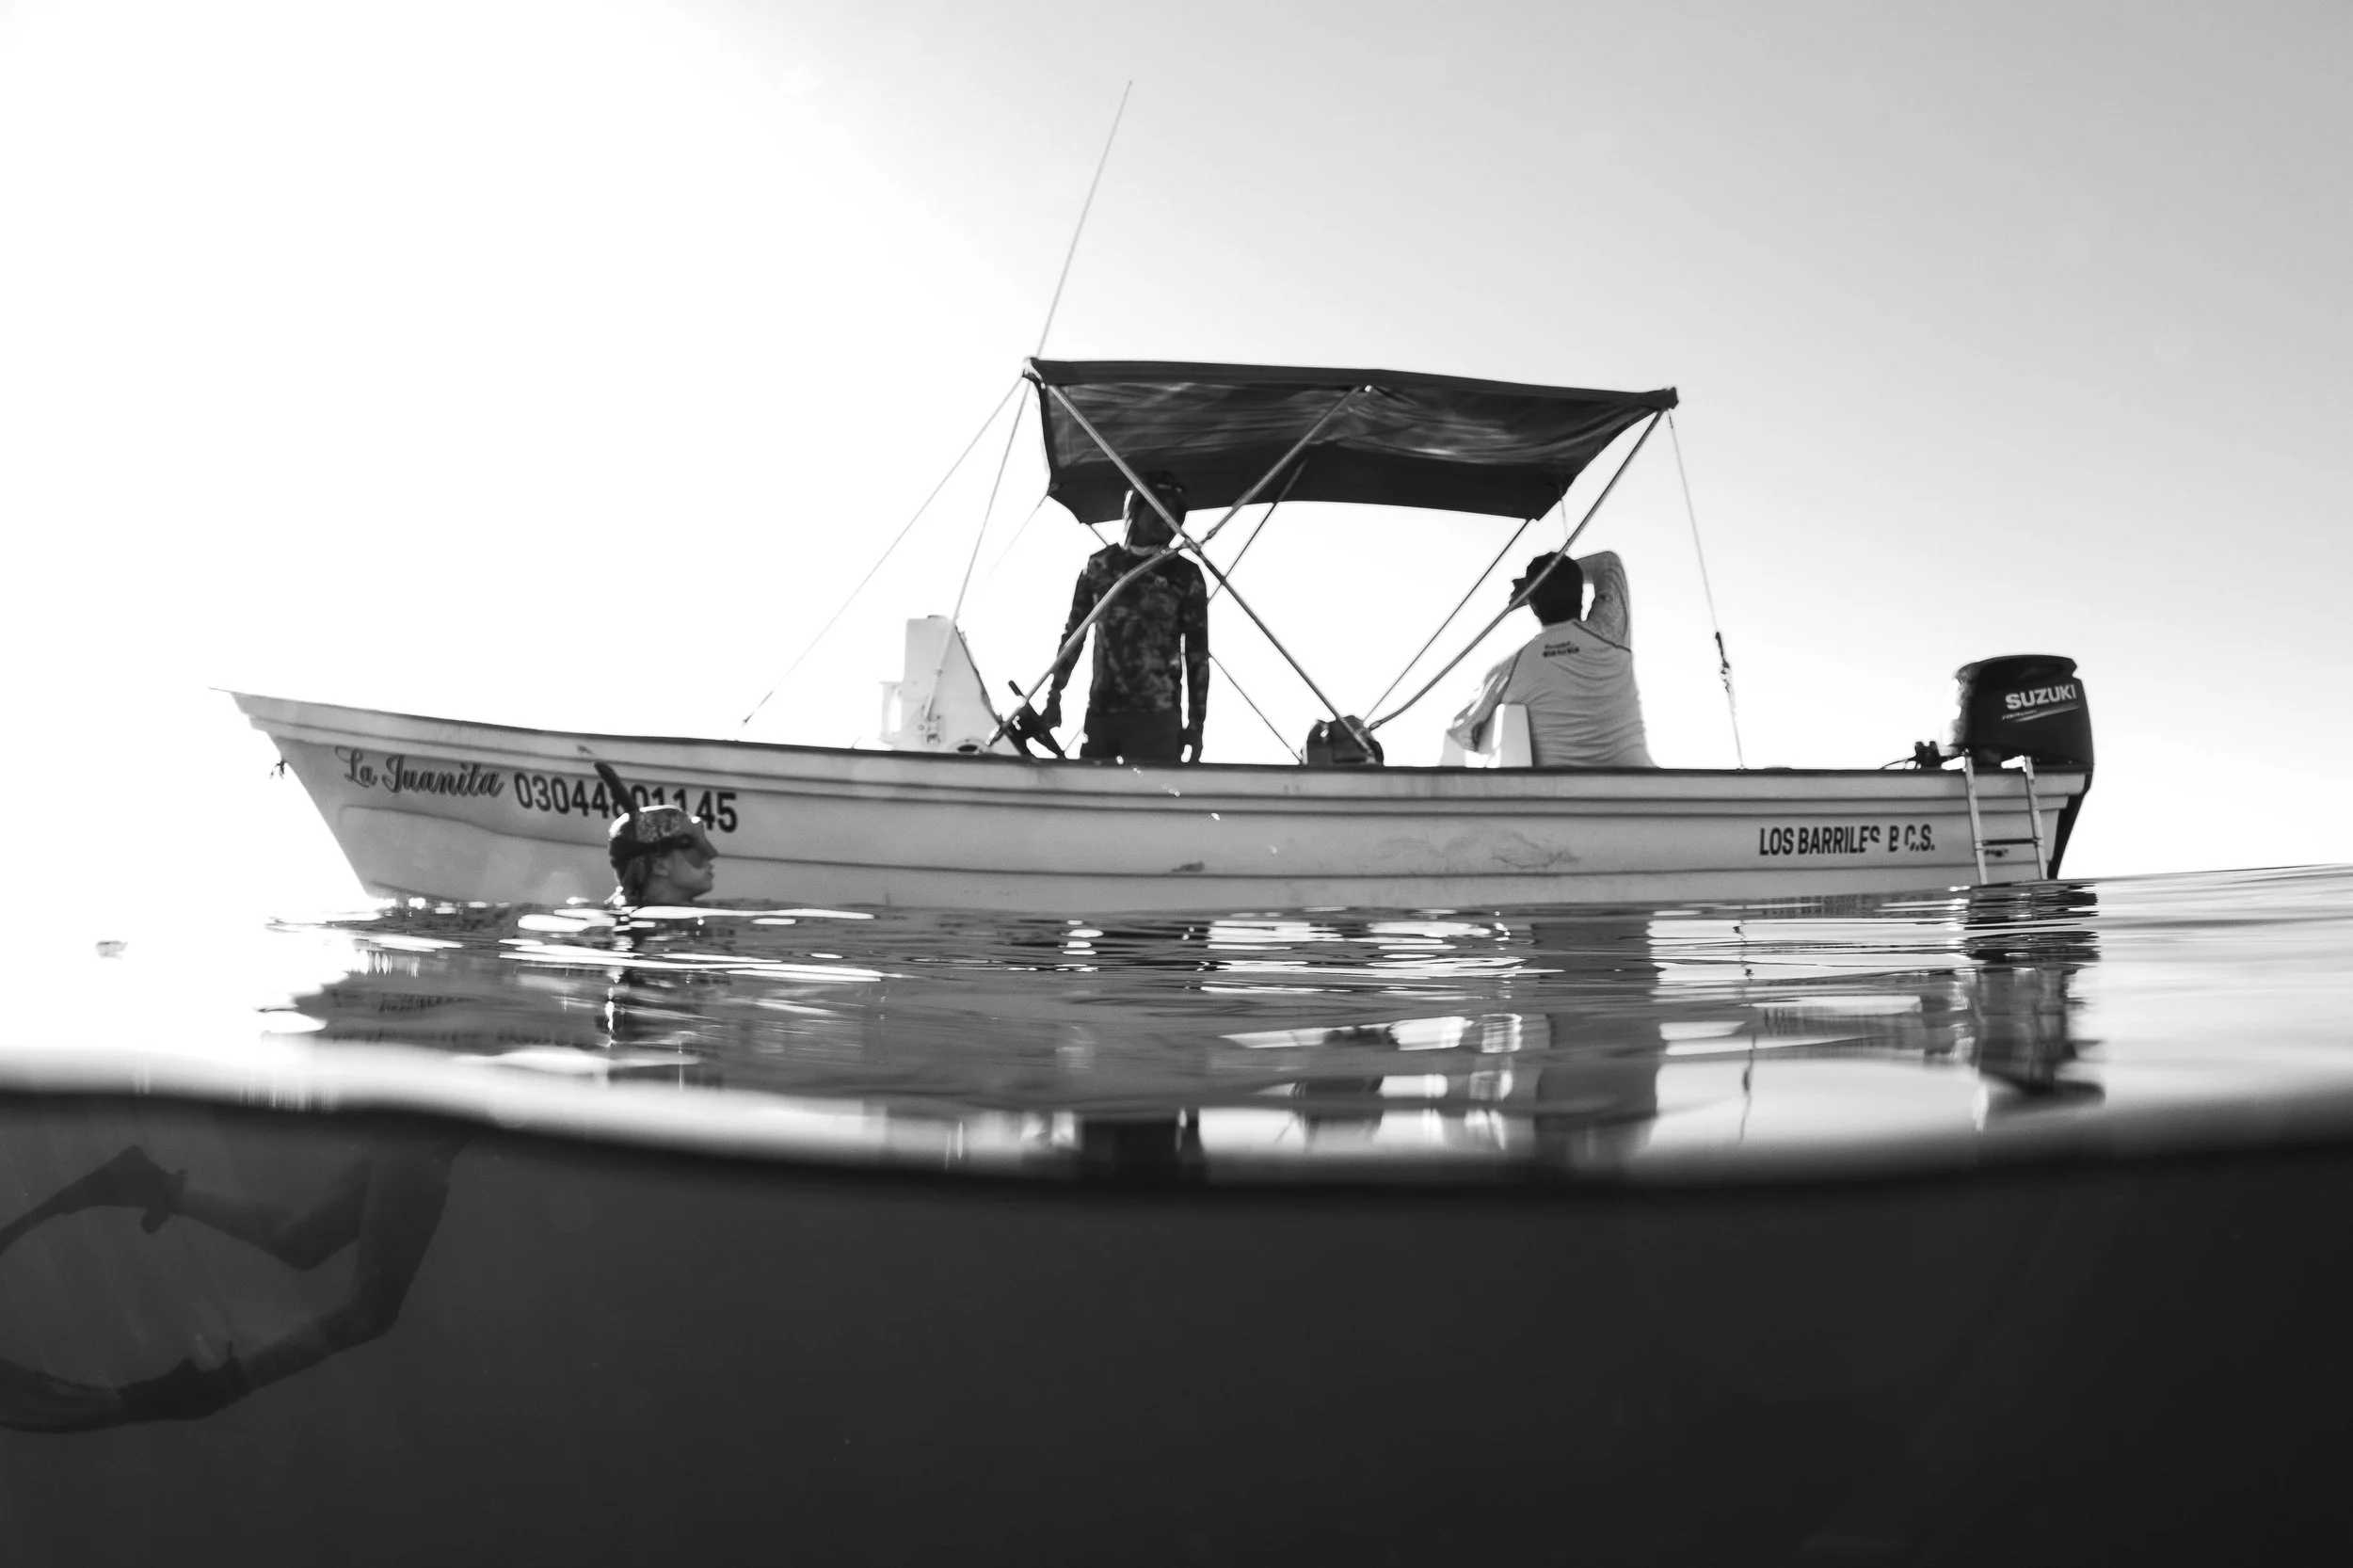
Black and white split shot showing a dive boat at the surface.
1. Balance white balance
Underwater shots often need warmer tones and less cyan, while the ‘topside’ requires a more natural and true-to-light view.
1. Control exposure
Exposure has a huge impact on split-shots.
To get this part right, lift underwater shadows gently and avoid halos and over-processed skies above.
3. Add contrast selectively
Local adjustments can help the underwater structure pop without looking fake.
Be selective here, and only adjust structures that need it while maintaining a realistic approach.
4. Cleanup
Cleanup is obviously super important as well.
Get rid of distracting droplets - these are very common on split-shots. Make sure to straighten the horizon and crop if needed.